Use Case
Event pages, RSVPs and QR codes
Give guests the details and a simple way to reply. Publish an event page, share its QR on invitations and posters, and keep everything up to date.
Scanely Pages
An event page ready for your invitation
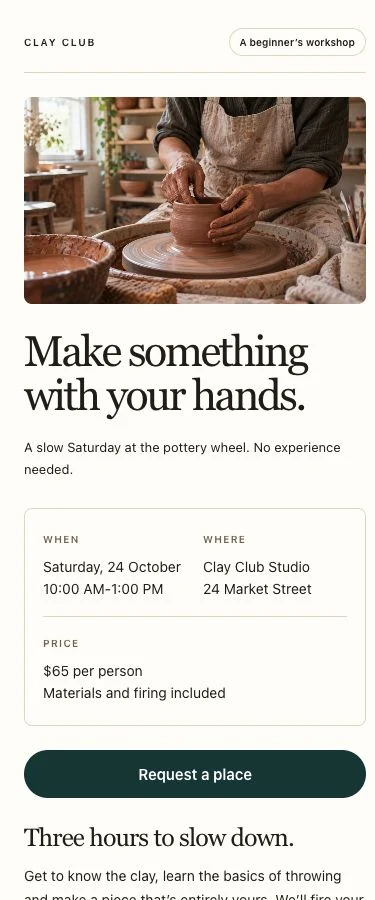
Start with a workshop, garden event or personal invitation. Add your date, venue, programme and photos, then publish a page that works on phones and desktop screens. Scanely hosts it for you.
A built-in form collects email, consent and your choice of name, phone and message fields. Replies appear in Leads. Use the success message to tell guests when you will follow up; submitting the form does not reserve a seat or issue a ticket.
All three event starting templates are available on Free. Free includes 10 form submissions per calendar month across the account. Paid plans raise allowances and add lead CSV export.
See which printed placements bring visitors
A poster at a coffee shop and a sign at your venue can link to the same event page. Give each placement its own dynamic URL code when you want to compare how often people open those links.
Scan analytics help you compare recorded visits by code, time and approximate location. They do not tell you who attended, whether a visitor booked or which poster produced a particular form response. Direct clicks on a QR link can also record visits.
Use dynamic QR codes for your event website, ticketing service or published Scanely Page. Name each placement clearly so that your next printing decision has useful visit data behind it.
When a room or programme changes, update your hosted Page or the destination of an external URL code. The printed QR stays the same. A hosted Page update can take up to a minute to appear.
For verified arrivals, use a separate ticketing or check-in system and link to it where appropriate. Our QR code attendance guide explains that wider workflow. Scanely’s QR visit counts are not attendance records.
Why events need QR tracking
Compare venue performance
Use a separate QR link for each poster placement and compare recorded visits by location.
Keep replies in one inbox
Collect simple RSVP responses on your hosted Page and follow up from the details in Leads.
Update event details
Change the date, venue or programme on your Page while keeping the same link and printed QR.
Collect feedback instantly
Share a Page with a private feedback form after a session and read submitted messages in Leads.
Events with vs without QR tracking
| Aspect | Without QR tracking | With Scanely |
|---|---|---|
| Poster effectiveness | No idea which poster location works | Per-location scan counts and comparison |
| Simple RSVP replies | Responses spread across messages | Hosted Page form with responses in Leads |
| Event updates | Printed details can become outdated | Edit hosted details behind the same QR |
| Feedback collection | A separate form link to distribute | Share a Page feedback form by link or QR |
| Sponsor reporting | No QR visit counts per placement | Recorded visits, separate from sales or ROI |
| Post-event analysis | No history of QR link visits | Recorded scan trends in your dashboard |
Popular event QR code use cases
From pre-event marketing to post-event follow-up, QR codes serve multiple roles throughout the event lifecycle. Here are the most impactful use cases.
Invitations and RSVP replies
Link a printed invitation to your hosted event Page. Collect simple replies in Leads and contact guests to confirm the details. If you need ticket sales, guest counts, meal choices or capacity controls, link to an external event service that provides those features.
Live schedule and session info
Print a QR on programmes and signs so guests can open the current event details. Update the text on your Page, or change a dynamic URL code to point to your external schedule. You keep the same printed code.
Speaker bios and session materials
Place QR codes outside session rooms linking to speaker bios, presentation slides or supplementary materials. Compare recorded visits to those links. A materials download or page visit does not verify attendance at the session.
Feedback surveys
Add a QR at session exits linking to a Page with a private feedback form. Ask for comments in the message field and read the responses in Leads. For custom survey questions or rating scales, link to a separate survey service.
Sponsor tracking
Create separate QR codes for sponsor booths, banners or programme ads. Report their recorded QR visits with a clear time range. Sales, qualified leads and return on sponsorship need separate evidence; scan counts alone do not establish them.
How to set up Scanely for your event
Choose an event template
Create a free account and open Pages. Start with a workshop, invitation or event template, or keep using your existing event website with a dynamic URL code.
Add details and a response form
Replace sample dates, photos and addresses. Explain what a guest should send and how you will confirm their place. Preview the page on mobile and desktop.
Publish and test the final QR
Publish the page, download its QR and scan it from a printed sample. A live test form submission creates a lead and counts toward your monthly allowance.
Separate placements when useful
For per-location comparisons, create additional URL codes pointing to the published page. Name and tag them by placement. Pages and additional QR codes share your plan’s slot allowance.
Review visits and replies separately
Compare recorded QR visits in analytics and read submitted responses in Leads. Confirm bookings yourself or in your event service. Lead CSV export is available on paid plans, including Lifetime.
Example setup: a local workshop
Publish a workshop Page with the date, venue, programme and an enquiry form. Put its QR on the invitation. To compare two poster locations, create one additional dynamic URL code for the coffee shop and another for the community noticeboard, both pointing to the published Page.
This setup uses three shared Pages and QR slots. Compare each poster’s recorded visits in analytics, then review form responses in Leads and confirm places directly with guests. Those responses are associated with the Page, not automatically attributed to the individual posters.
Before printing, follow the RSVP QR setup guide and test the final code. This is an example workflow, not a customer result or a promise of more registrations.
Switch external destinations on event day
For URL codes, schedule a one-time destination change for your event dates or daily windows for recurring sessions. Select the event’s timezone and keep a fallback URL outside the active window. Schedules require Pro, Business or any Lifetime plan and are not available on Page codes. To measure completed registrations on your own website, configure consent-aware conversion tracking and send an event after a successful registration; linking to an external form alone is not enough.
Read the scheduling guideFeatures event organizers love
- Hosted event, workshop and invitation Pages with editable content
- Simple RSVP and private feedback forms with responses in Leads
- Dynamic QR codes - redirect to live schedules on event day
- Compare scan performance across venues and sessions
- Track engagement by time to find peak activity windows
- Campaign tags for locations, sessions, and sponsors
- Raw scan CSV for post-event reporting on Pro, Business and all Lifetime plans
- Free QR code generator for posters and programs
Frequently asked questions
Can I create an event page without a website?
Does an RSVP form confirm a booking or issue a ticket?
Can I compare QR visits from different poster locations?
Can I change event details after printing the QR?
Can Scanely track attendee check-ins or sponsor ROI?
A feedback sign for your next event
Link a published attendee form from a free US Letter sign. Check that guests can submit while signed out, then scan a printed proof.
Make a free feedback signFor scan tracking, create a dynamic QR first and use its dashboard Print kit.
Related use cases
Give your next event a page of its own
Start free. No credit card required. See pricing plans for advanced features.